Showing posts with label tutorial. Show all posts

Friday, April 18, 2014

Humble Beginnings; Eggstravagant Easter Eats


 Hello + Hello!
How are you doing? 
I'm doing pretty well myself, other than the fact that my laptop is experiencing major technical difficulties.  
Boo!!!!!!
So, today I'm posting from my good old iPhone. I'm sure the format of this post won't be the same as normal, 
but please bear with me ok?

I wanted to encourage those of you who might be uninspired to celebrate Easter this year due to financial woes, tough times or just plain busy-ness. I've got a simple little recipe that's sure to knock your socks off & not even come close to breaking either your time or financial budget this weekend.
I'm a really big fan of fresh eggs from our chickens. They are really laying good right now too (bonus!) so I decided a simple but sophisticated recipe was in order. Sometimes fresh eggs don't peel very well when boiled... so although I love Deviled Eggs... they don't really turn out so pretty for Easter brunch. Thus the following recipe:

Egg Salad on Toast Points with Dill & Fresh Cracked Pepper

If you don't have chickens, no worries...simply grab a dozen eggs at the market for a few dollars & get started. 

You'll need:
1 dozen hard boiled eggs finely chopped
1 dollop mayo ( about 1cup )
1-2 T. yellow mustard
1 tsp. dried dill
Mix ingredients together to taste, adding more or less mayo or mustard. Set aside.


Next, toast your bread until medium brown. Trim off edges & cut diagonally into triangles.


Then spread egg mixture onto toast points. 


Last, sprinkle your toast points with:
1 green onion chopped fine
more dried dill
fresh cracked, or regular black pepper 
salt to taste
Eat within 1 hour or toast will become soggy.


Don't forget to add garnishes such as grape tomatoes, cucumber slices or mini carrots. Serve with tea or coffee & Easter candy. 

Relax & enjoy your day... because after all

HE LIVES!!

XX 
Trish

Saturday, February 8, 2014

Tight on Time... Valentines!

 Hello + Hello!
Happy Valentines Week!
Are you feeling like your back is against the wall?
( Kinda like I am? )
You've got so many things going on as a working mama,
your kids need Valentines for school
&
there's probably no way you'll ever have the time to
 bake those cookies you said you'd bring to your
next "organized" gathering?
 
>>>>>---------------->
 
Well,
have I got a fun
quick and easy
Valentine Sweet
for you!
 
 Gather up some simple ingredients:
Tub of Cream Cheese Spreadable Frosting
Package of Graham Crackers
&
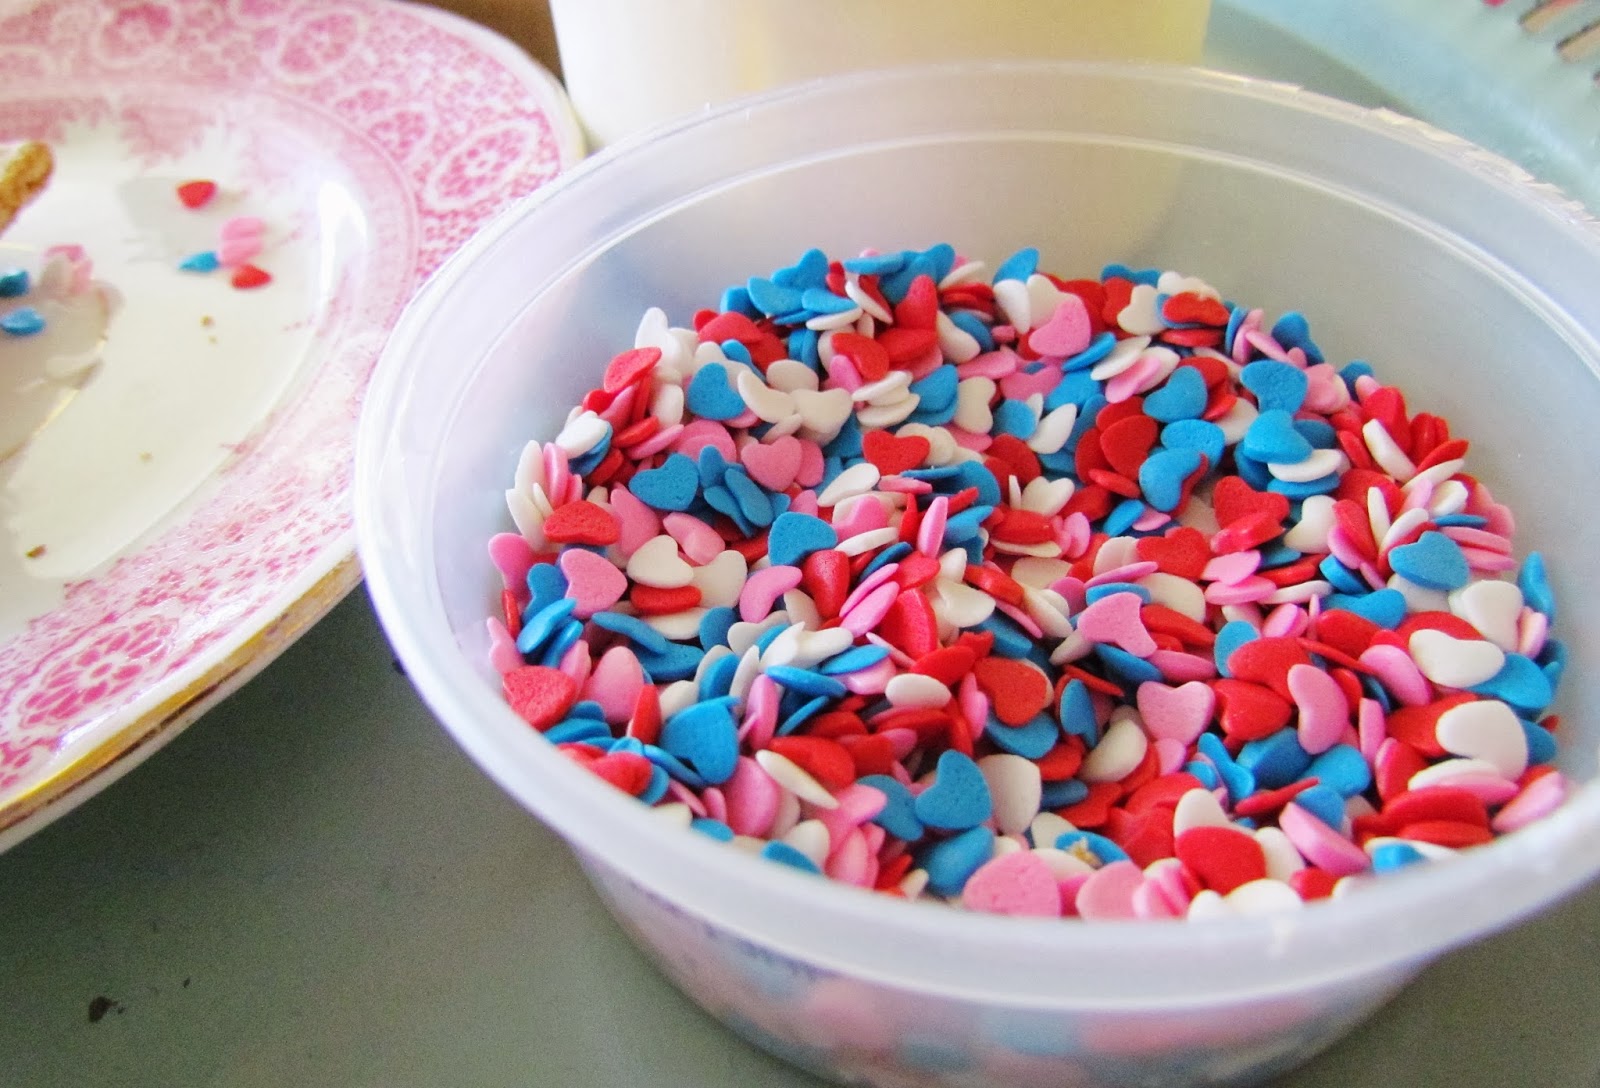
Fun Valentine Themed Sprinkles
 
 First grab a butter knife and spread a dollop onto 1/2 a graham cracker.
Sandwich the frosting with another 1/2 graham cracker piece.
As the frosting oozes out the sides, spread to cover the edges evenly.
 Dip the sandwich into the sprinkles...
 ...on all four sides & set aside.
 Move on to each graham cracker sandwich repeating as you go.
 If you are like me, you'll have to sample as you go.
 As simple as this "recipe" sounds,
you will be
BLOWN AWAY
by how tasty the
sandwiches really are!
Not only are they super cute & super tasty....
BUT
they are super easy too!
Win>>>------> Win
right?
 
>>>>>--------------->
 
Here's to a sweet & easy new week.
May you celebrate the old loves of your life...
but don't forget to find some new loves too!
XOXO
T.

Monday, September 16, 2013

Green Tomato Pesto - My Hubby's Specialty

 Hello + Hello!
How are you my friends?
I've been enjoying the fruits of the season....have you?
Lately my hubby's selection of delicious heirloom tomatoes
has been ripening up and overproducing.
(Yippee!!!)
But....
we just know they aren't all going to make it to
a red, orange or yellow state of deliciousness.
So
he gathered up a big bunch of
greenies
&
went to town making
Green Tomato Pesto!
 Have you ever tried this method?
We just LOVE it!
The best part is once you've pureed up a batch....
you simply freeze it to preserve it!
 We use ice cube trays.....
 ...it makes it simple and easy to pull a few out to make:
-pasta sauces
-dips
-soups & stews
or
-salad dressings
 If you've found you are going to be stuck with a
plentitude of green tomatoes....
maybe you would like to try this too?
If so....
here is the recipe for:
First, gather your ingredients:
-1/2 cup mint
-1/2 cup basil
-1/2 cup arugula
-1/2 cup dill
 
Chop all herbs and add to blender or food processer.
Then add:
5 medium green tomatoes, cut up
1 clove minced garlic
2 T. fresh grated Parmigiano-Reggiano cheese
Blend slowly while drizzling in 1/2 cup of olive oil.
 
Once the mixture is to your liking
(there is no correct consistency, some like it chunky...others smooth)
pour it into ice cube trays and freeze.
 
Once frozen, place in airtight freezer bags or containers to be used for future recipes.
I also recommend cooking up a big
pot of pasta right then....
so you can enjoy your fresh
Green Tomato Pesto
RIGHT AWAY!
 
>>>>>--------------->
 
Recipe from the late and great


Saturday, June 22, 2013

Play Your Vintage Cards Right; A Bunting DIY Tutorial

 Hello + Hello!
How are you all doing today?
I hope you are well?
Today I'm going to share a simple little tutorial with
old playing cards.
I seem to find these fun little sets of playing cards while I'm out thrifting.
Honestly, I don't play cards all that often,
but when I do it's pretty much
Go Fish, Old Maid or Uno with my sons.
Although my boys are learning new games that include regular
card playing....they have their own set of cards they like to use.
SO,
since I have no use for the cards in their original purpose....
I do like to purchase them for their fun design alone.
Now,
hmmmm.....what to do with these little cuties?
Well in order to enjoy the illustrations on a daily basis,
I SHOULD MAKE A BUNTING!
Want to know how? It's pretty simple, so here we go:
 
 HOW TO MAKE A PLAYING CARD BUNTING
 First: Gather your supplies.
- Assorted vintage playing cards
(You could also use scrap greeting cards; imagine a fun Christmas card bunting!)
-Thick string, bakers twine or yarn to match
-Piece of tape
-Scissors or cutting board
-Hole punch
-Ruler
-Pencil/Pen
 
 
 First,
measure to the center of the bottom on the face of the card.
From that measurement either free hand cut with a scissors or with the cutting board
out to each top corner. This will create your triangle.
 Then, hole punch the top two corners.
Next, wrap tape around the end of the string/yarn & begin to
thread your pennants on.
You can make your bunting as long as you like!
If you end up having a poker party....you can simply flip the bunting around
and enjoy your cards at face value!
I think this is a fun little tutorial,
and can be used for many different applications.
Imagine this in a child's room with vintage
old maid cards or memory cards....
birthday parties with vintage birthday cards...
in a classroom with vintage flash cards.
You can go on and on!
I hope this little project will inspire you to come up with your own
little buntings.
Remember, they are fun for celebrations....
but in my opinion, bunting is for everyday enjoyment.
Celebrate life, make and hang some bunting!
Cheers!
T.
xx


Saturday, March 9, 2013

White Chocolate Lemon Cranberry Puffs: Easy Peasy Recipe

 Hello + Hello!
Is anyone out there???
Are you faint from lack of Spring deliciousness?
Oh my....have I got just the thing to
tantalize your tastebuds, your wallet & your timeline!
This is just about the easiest recipe
I've created in a long time!
 If you are like me, you love the sweet tart taste of lemon.
(However, this recipe could be easily adapted as lemon-less too!)
I simply love the way
a sweet lemony flavor can bring my tastebuds to life in one bite.
Add to that
white chocolate & cranberry
 and well....
you have bliss!
(These puffs are an inexepensive way to get your Cranberry Bliss Bar fix from Starbucks.)
SO, without further ado, here we go....
 
>>>>>--------------->
 
GATHER YOUR INGREDIENTS:
- One box of lemon flavored cake mix
(you could use a yellow cake mix for a lemon-less flavor)
-2 eggs beaten
-3/4 cup greek yogurt 
-1/2 cup dried cranberries
-1/2 cup white chocolate chips
- One package of store bought cream cheese frosting in a tub
- Sprinkles if desired
 
Preheat oven to 350*
 
TO MAKE:
Mix all ingredients together in a medium bowl.
Scoop heaping tablespoons of the batter onto an ungreased cookie sheet.
 Bake for 10-12 minutes or until tops begin to lightly brown. Cool completely.
Once puffs are completely cool, spread tops with cream cheese frosting and add sprinkles.
Brew yourself some tea and enjoy alone....
or if you can bear to share them...
with some friends or family.
 

Just a warning....
even though this recipe made about 24 puffs,
we ate them in less than 2 days.
(Hangs head in shame.)
Cheers from the puffiest puffs around,
T.
LOL
xx

Friday, March 8, 2013

Festive Ice Cream Sundae Flags Tutorial DIY

 
Hello + Hello!
How are all you lovelies?
Happy Weekend to you!
I thought I might drop in here and share a few more outtakes from the
little book feature I did for
in
If you'd like to know more about this
awesome crafty ice cream book
 
>>>>>--------------->
Today I wanted to share a few photo outtakes of
my ice cream cozy
&
share a simple tutorial on making my ice cream sundae flags.
Although the directions for the ice cream cozy are in the book
(Wouldn't want to spoil it now, would we?)
The simple instructions for the
sundae flags are not.
So,
here we go:
Gather your materials:
-bamboo skewers
-assorted ribbons (wired works best)
-ruffled confetti fringe paper garland
-extra sticky craft glue
-scissors
 
>>>>>--------------->
 
DIY
Cut a piece of ribbon about 7-8" long. Coat the inside of the ribbon with the tacky craft glue.
Lay the blunt end of the skewer in the center of the ribbon, and fold ribbon over on itself.
Allow to dry. Meanwhile cut a piece of the paper fringe garland about 2" long.
When the ribbon is dry, trim the end in an inverted V shape.
Twist the ribbon to look as if it's flying in the wind.
Glue the paper fringe garland snippet to the top and allow to dry.
(If you can't find paper fringe, use a pom-pom instead.)
and
Voila!
Festive Ice Cream Sundae Flags!
These work great for cupcakes and wedding cakes as well.
I hope you enjoyed this simple little tutorial.
Like I said earlier,
if you like these ideas and more....
you can find a ton of them in
Thanks for stopping by!
Cheers,
T.
xx


Monday, March 4, 2013

Everything Goes With Ice Cream, Even Me! My New Book Feature Reveal

 Hello + Hello!
Eeeeek!
I'm so happy to stop in here today to share a little....
no.....ALOT of excitement and joy!
 
I'm happy to annouce that I'm:
 
Have you heard about it yet?
I am truly in love with this adorable book put out by one of the most
genuine bloggers I happen to know,
The book is filled to the gills with
cute crafts, ice cream recipes, quotes & of course....
Happiness!
Because frankly....who isn't happy with loads of ice cream?!
There are seasonal ice cream recipes for
Spring, Summer, Autumn & Winter.
Chocolate, Caramel, Hot Fudge & Sea Salt
rival with
Lemon, Strawberry, Watermelon & Coconut.
There are cookies, sandwiches, pink cinnamon rolls & fudge!
Learn to make pom+pom bunting
&
handkie aprons.
Or maybe you'd like to find some new home made gift ideas for the
Holidays?
GAH!!!!!
There's simply too much to list!
(Trust me when I say, I'm not even scratching the surface here.)
With 111 recipes & 176 full color pages filled with
amazing photography,
you can rest assured this book is worth every penny.
 
Koralee and I have gotten to know eachother via the internet for the past few years.
My sister La Von was the one who got me hooked on Koralee's blog.
(Thanks La Von!)
She said to me one day:
"I can't believe you don't follow Koralee's blog! She is SO YOU!"
Well,
I immediately went home and googled
&
somehow Koralee & I connected and hit it off almost immediately.
Divided by a border
(she lives in Canada & I live in the States)
we have still yet to meet in person!
(Trust us....we know! Pretty sad huh?)
Koralee has been a shopper at our store
and even though we both cross the 49th Parallel fairly often...
our busy lives have yet to collide.
HOWEVER,
we have enjoyed countless chit chats via
Facebook, Instagram, Twitter & Blogging.
So...
even though we can't seem to get it together physically....
we are enjoying eachother's company virtually.
Someday we'll get it together right Koralee?
LOL!!
>>>>>--------------->
What I'm so excited about is:
 
There are so many other new friends to find in this book.
If you like to visit wonderful blogs...then you should
get this book and start visiting all of
Koralee's friends.
Each friend is featured just like me with a recipe & a fun crafty idea.
I can't wait to start making the blog rounds with these
very talented ladies;
some of whom you may already know!
>>>>>-------------->
So, yeah....
I'm floating on a cloud right about now as this is my first real book feature.
Thanks oodles and oodles Koralee for the chance to share
in the joy of your sweet book.
You are a true friend & I appreciate all you do.
If you don't know
then you should take my word for it
&
head straight over there
right after you get her
delightful book;
From
Jo Packham
of
 &
 
 
Thanks for sharing in my joy everyone!
You are all so kind to follow along as I find my place in this world
of blogging, print & design.
Cheers my friends,
Trish
xx


Sunday, March 3, 2013

The Green Meanie: Creating A Monster In My Kitchen

 Hello + Hello!
How are all my lovelies this new week?
Are you having the winter time blues yet?
Don't worry.... Spring is just around the corner!
I have been trying everything to keep positive, as it's been so dreary around
here lately with so much rain.
One way I've found a bit of cheer in my day is this
wild concoction I made up in my kitchen the other day.
I call it
THE GREEN MEANIE
I have been trying to be good about taking this product below:
 Have you been on
lately seeing all the hype about
Bragg Raw Unfiltered Organic Apple Cider Vinegar?
I have...and I can tell you that I'm taking it very seriously.
Now HEAR ME when
I tell you that I'm no expert...
I'm not even a health nut.
But,
my mom used to drink vinegar for a number of reasons...and it kind stuck with me.
I don't mind the taste of it alone in a cup of water.
However, it gets a little blah day after day.
So,
I decided to create my own "drink" to shake things up a bit.
(get it? SHAKE?!)
 Warning:
This drink is not a miracle.
It won't change your life;
it will just make some
"good for you"
foods
easier to drink.
It does not taste like a Margarita....or a Pina Colada.
It tastes healthy...
but does NOT taste bad.
It is filling & nutritious.
So,
now you have a reason to drink water
(because that's always pretty good, right?)
and eat an orange & some spinach
(think of all that fiber & vitamin C!!)
&
you can get some of that
apple cider vinegar
goodness too!
Want to know more about the benefits of
raw organic unfiltered apple cider vinegar?
I recommend checking this list out
over HERE.
You can find so many more articles online just by googling
apple cider benefits.
 
>>>>>--------------->
 
I hope this is an inspiration for you.
Remember, I'm no expert.
Just thought it might be nice to share
the benefits of having a
GREEN MEANIE
in YOUR kitchen.
Cheers!
T.
xx

Monday, December 3, 2012

Spreading JOY from a Pizza Box: DIY & Linky Party!


Hello + Hello
&
JOY
to
the
World!
How are you this fine Christmas-tide?
I'm having such a lovely holiday season so far...I hope you are too!
My little boys and I have been all over the place in this house doing all sorts of wonderful things with our Christmas Decor.
one of the things I had inteded to do this season was to purchase a huge
NOEL
sign from my own shop
but...
before I knew it the signs were all gone.
(That happens more often than not for me! Oh well, you snooze you lose.)
SO,
we improvised instead!
This was probably meant to be anyway as it turned out to be a really fun time for
the two boys and myself.
First we found a few frozen pizza boxes in our recycle bin.
Then we went to work
"making a little (er...or....a big) JOY!"
 After finding the boxes and ripping them open, we (2) traced out some large letters. Then (3) cut them out. Next (4) we painted the letters with white Chalk Paint by Annie Sloan. From there (5) we punched holes in the tops of the letters & (6) coated the letters with Matte Mod Pod and mica glitter flakes. Last (7) we strung the letters onto ribbon and hung on our 1898 Eastern Hemisphere Antique pull down school map.
Voila!
JOY TO THE WORLD!
It was so much fun!
After the sign was hung we went to work placing our ever growing collection of globes around the bottom of the map on our antique Scottish buffet.
 Of course, we needed to use up some of my collection of
vintage and antique ornaments in the display....
....how perfect they mirrored the look of the round globes!
 It was fun to continue on to the bookshelf that holds our random collection of whatnots.
 
 I flipped my (normally wallpapered) star around and gave it the
royal treatment with mica glitter as well!
Each and every nook and cranny has been filled with
Christmas Cheer.
So,
what about you?
What fun things have you been up to this season?
Are you all decorated?
Or....not so much?
I'd love to hear from you!
>>>>>----------------->
Also,
something exciting is happening here today with a bunch of wonderful people
 who I so fondly
refer to as
Inspirational Folks!
All of us
contributors have started linking up to eachother's blogs so that you can
peek in and enjoy what we're up to this
Merriest of Seasons!
I hope you'll get the chance to head over to
to see what all these lovely folks are up to all over the globe at Christmas time.
Cheers to each and everyone of you....
&
happiest of decorating!
T.
xx